ZUSMPP Manual – General Settings
Location: Main Menu → General Settings
System-wide configuration section with the following submenus:
· Email Settings – Configure SMTP
· Email Templates – Manage email templates
· 2F Authentication – Two-factor authentication setup
· Secure Pin & Data – PIN and data protection
· Invoice Settings – Invoice formatting and rules
· Tax – Tax configuration
· Manage Logo – Upload system logo
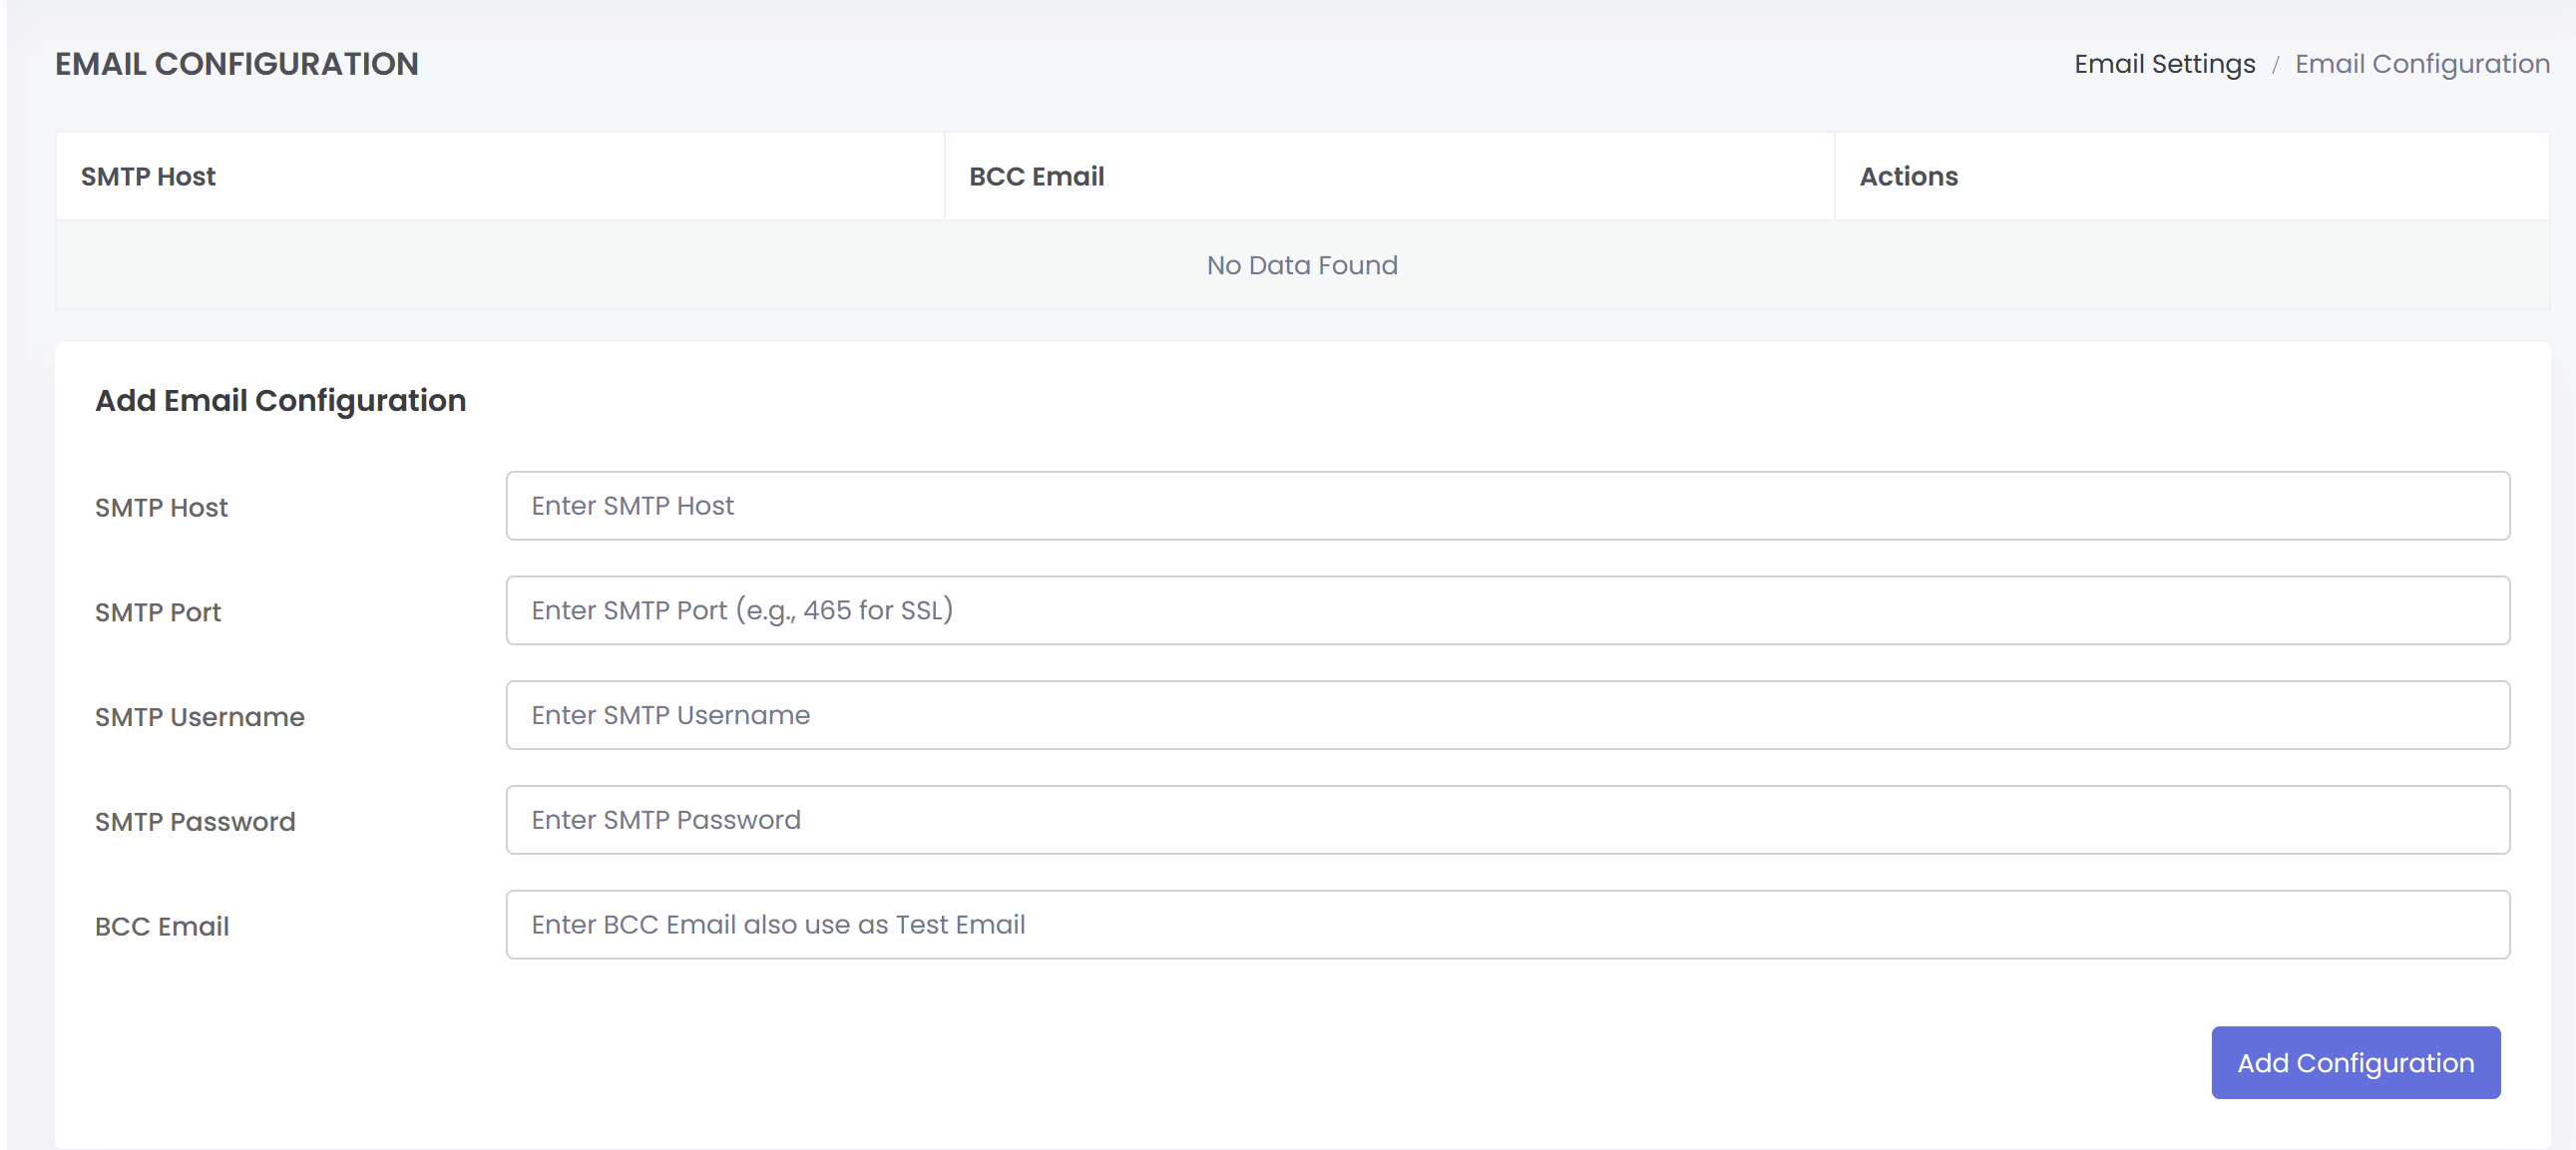
ZUSMPP Manual – Email Settings
Location: Sidebar → General Settings → Email Settings
Configures the SMTP server used for sending all system emails, including invoices, notifications, and alerts.
1. Email Configuration List
Displays existing SMTP server setups in a table with columns for SMTP Host, BCC Email, and Actions (Edit/Delete).
2. Add/Edit Email Configuration
Form to set up a new SMTP server or modify an existing one. Required fields include:
· SMTP Host
· SMTP Port (e.g., 465 for SSL)
· SMTP Username
· SMTP Password
· BCC Email (also used as the test email address)
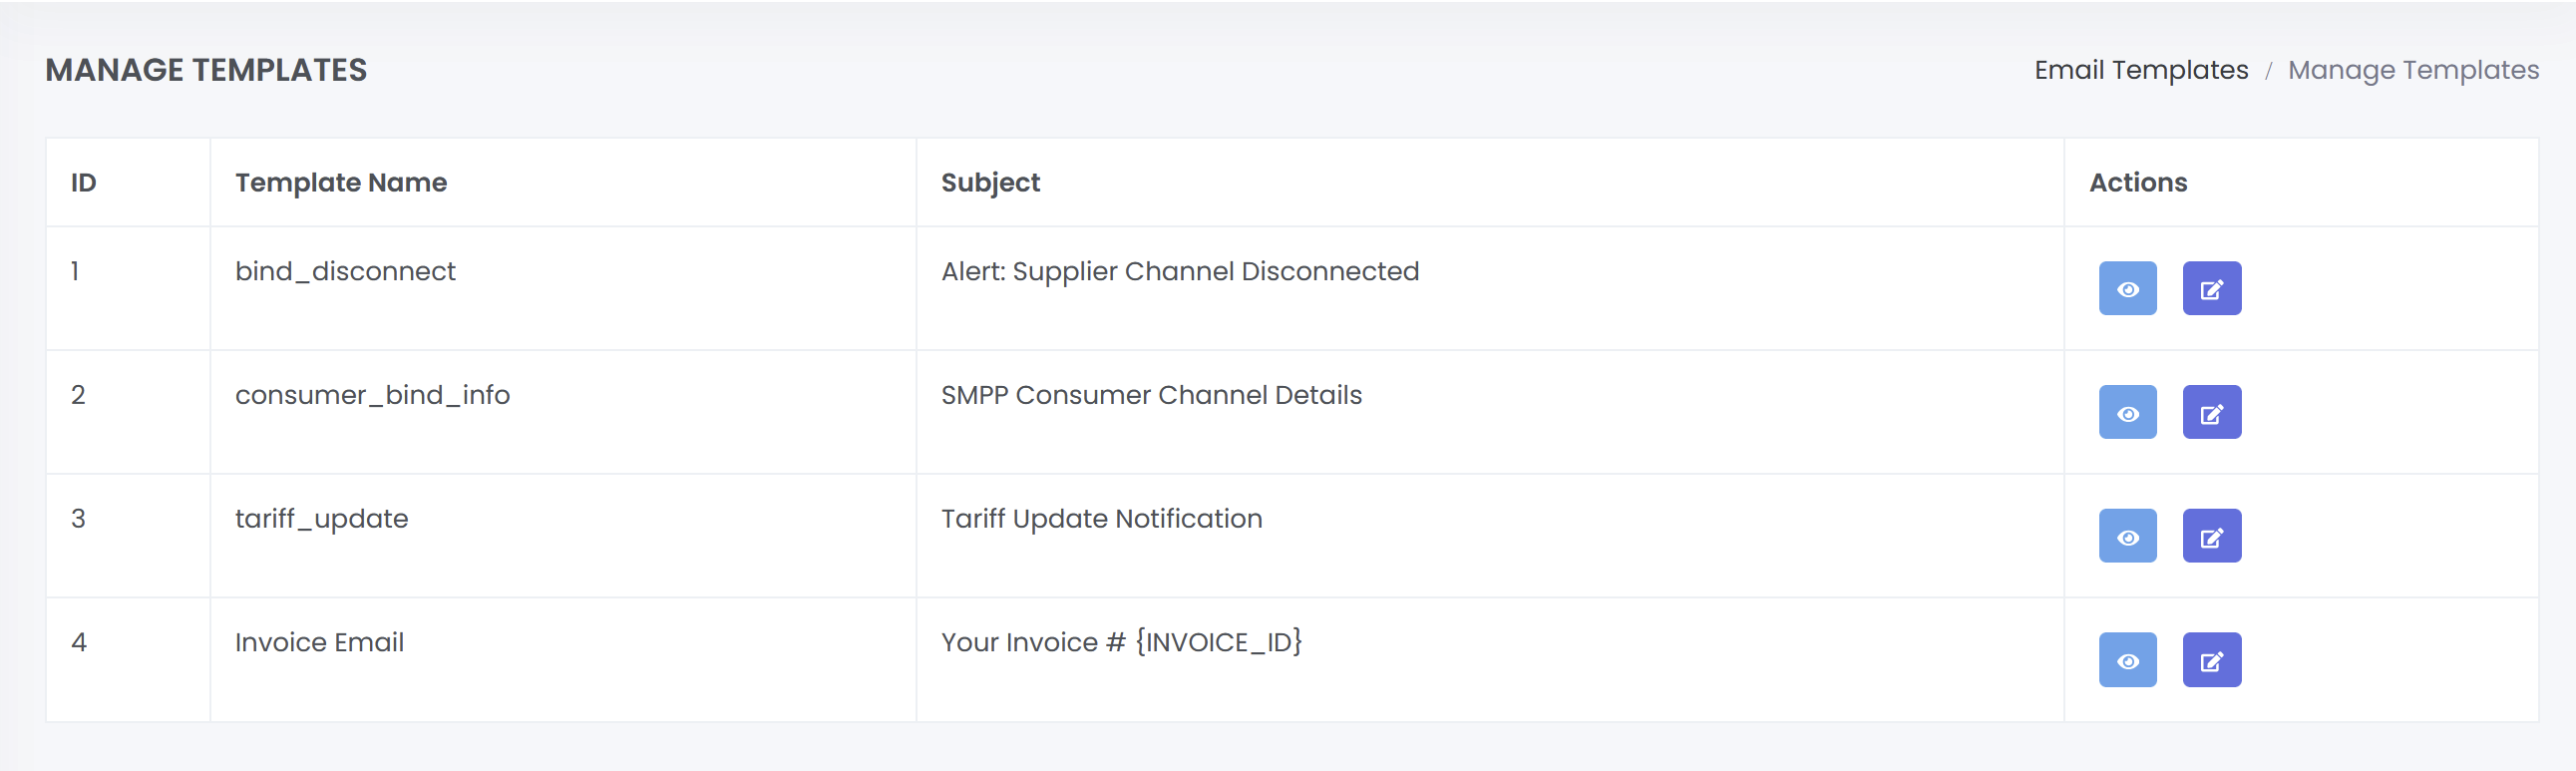
ZUSMPP Manual – Email Templates
Location: Sidebar → General Settings → Email Templates
Manages the content and subjects of automated emails sent by the system.
1. Email Templates List
Displays all system email templates in a table with columns: ID, Template Name, Subject, and Actions (Edit/View).
2. Template Management
Allows administrators to modify the content and subject line of predefined email templates used for:
· Invoice emails
· Rate update notifications
· Supplier channel disconnection alerts
· Consumer channel information emails
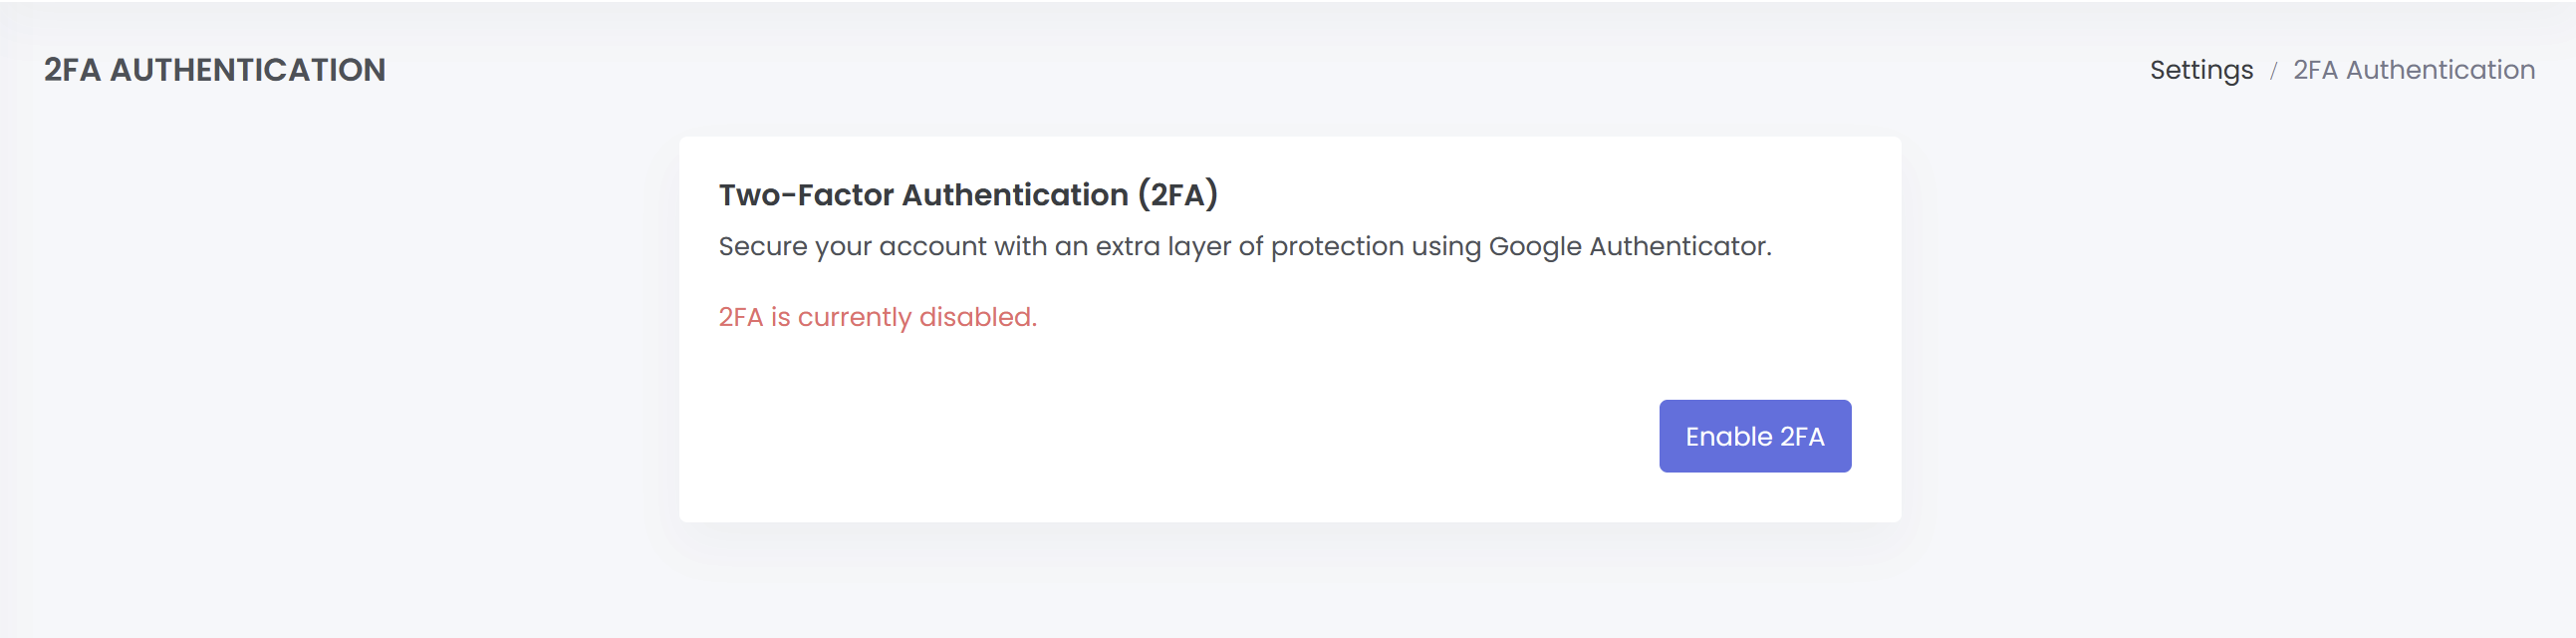
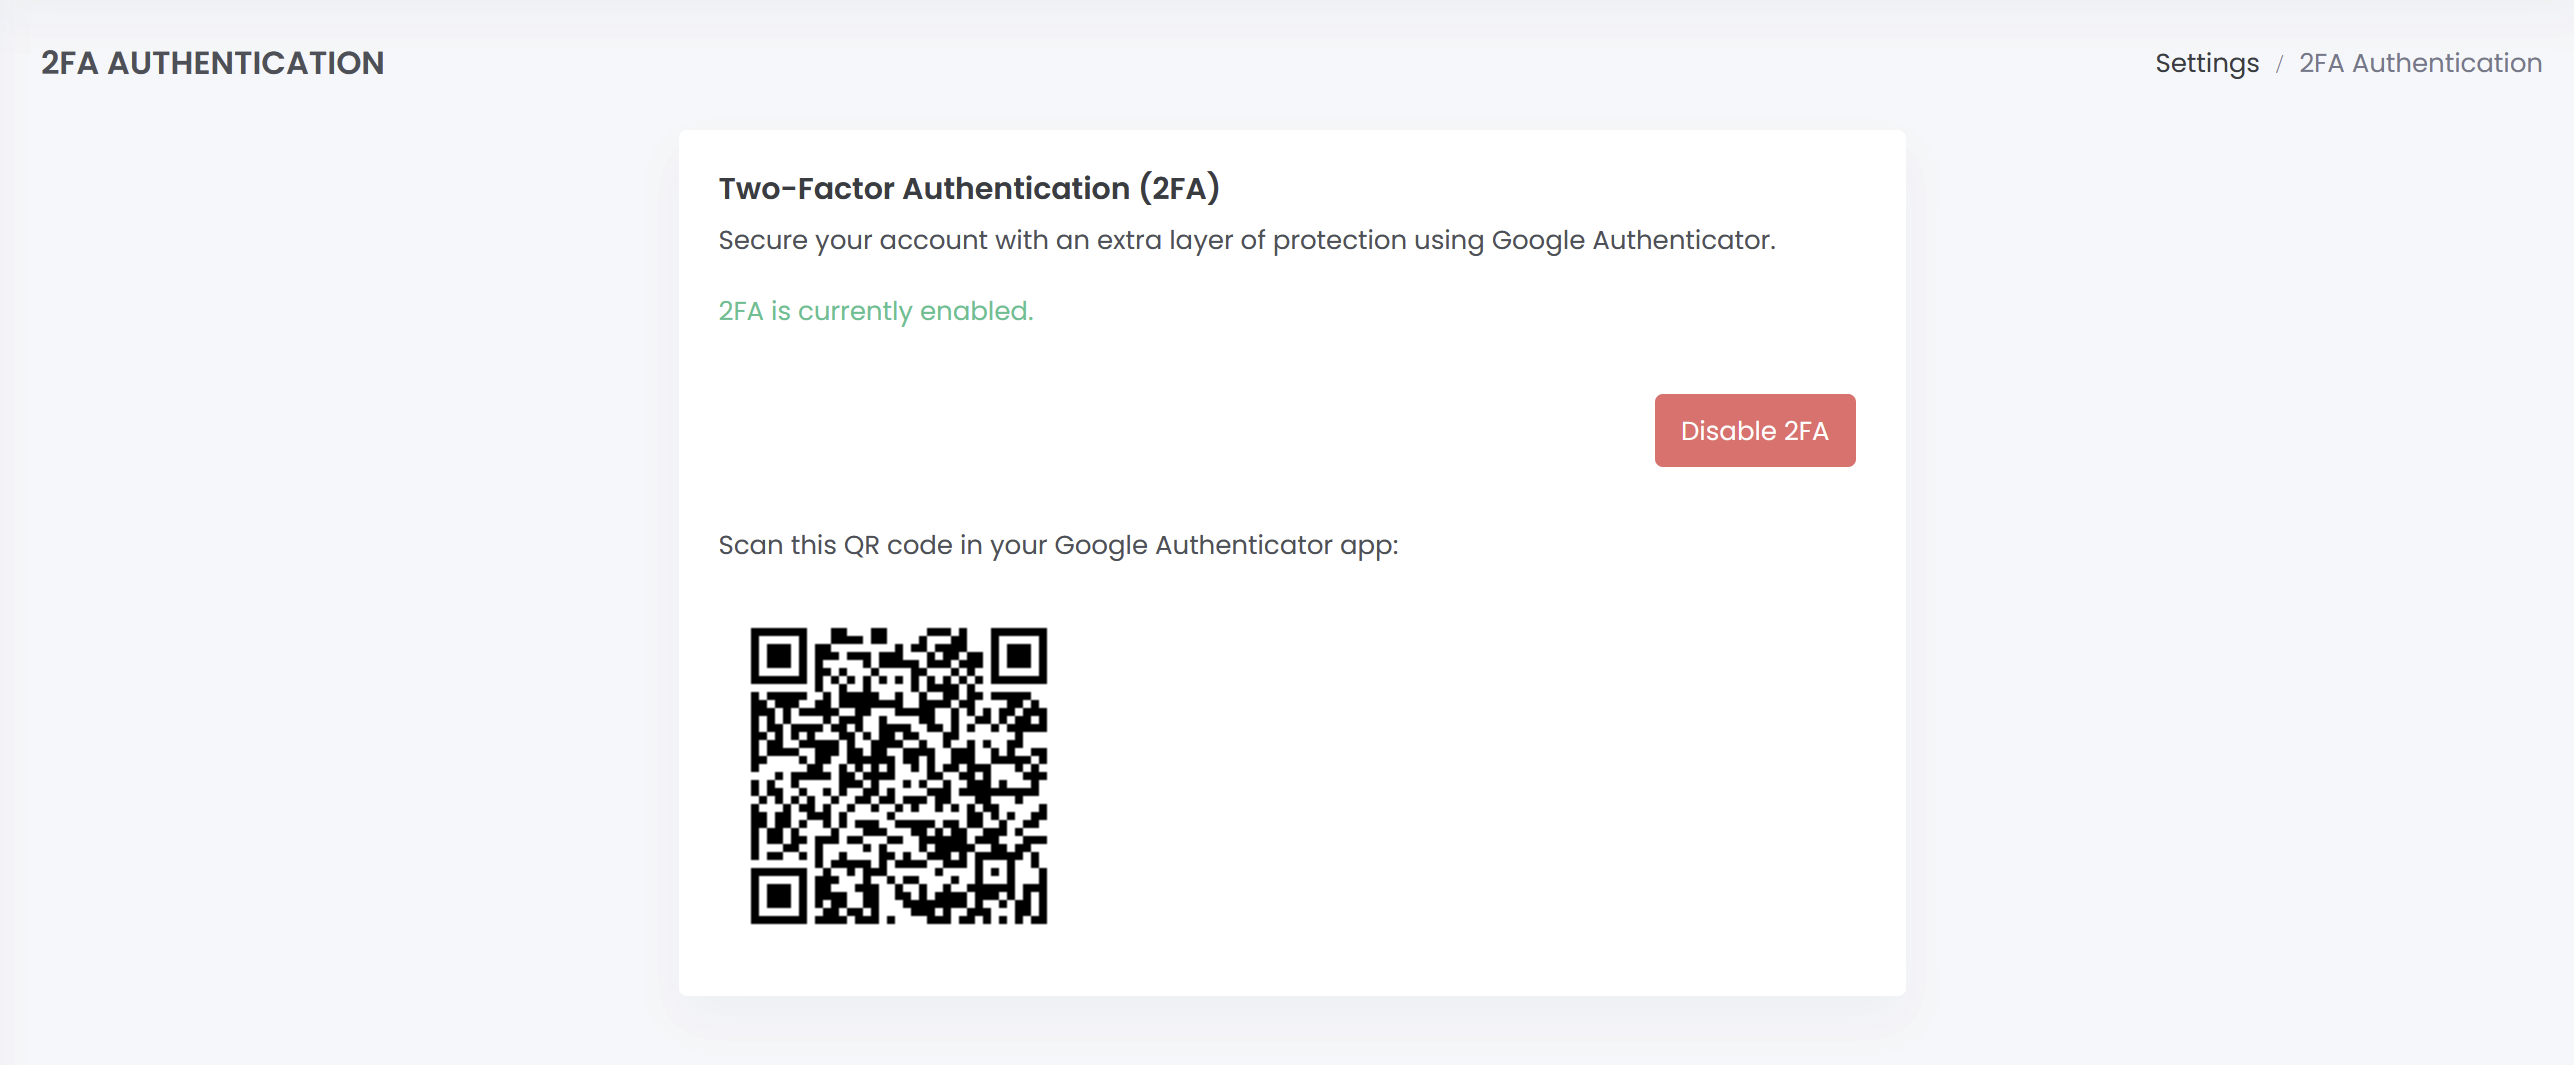
ZUSMPP Manual – 2FA Authentication
Location: Sidebar → General Settings → 2FA Authentication
Manages the two-factor authentication (2FA) settings for user accounts using Google Authenticator.
2FA Status and Control
Displays whether two-factor authentication is currently enabled or disabled for the account. Provides an Enable 2FA button to activate the feature and a Disable 2FA button to turn it off.
When enabling 2FA, a QR code is displayed for the user to scan with the Google Authenticator app to complete the setup process.
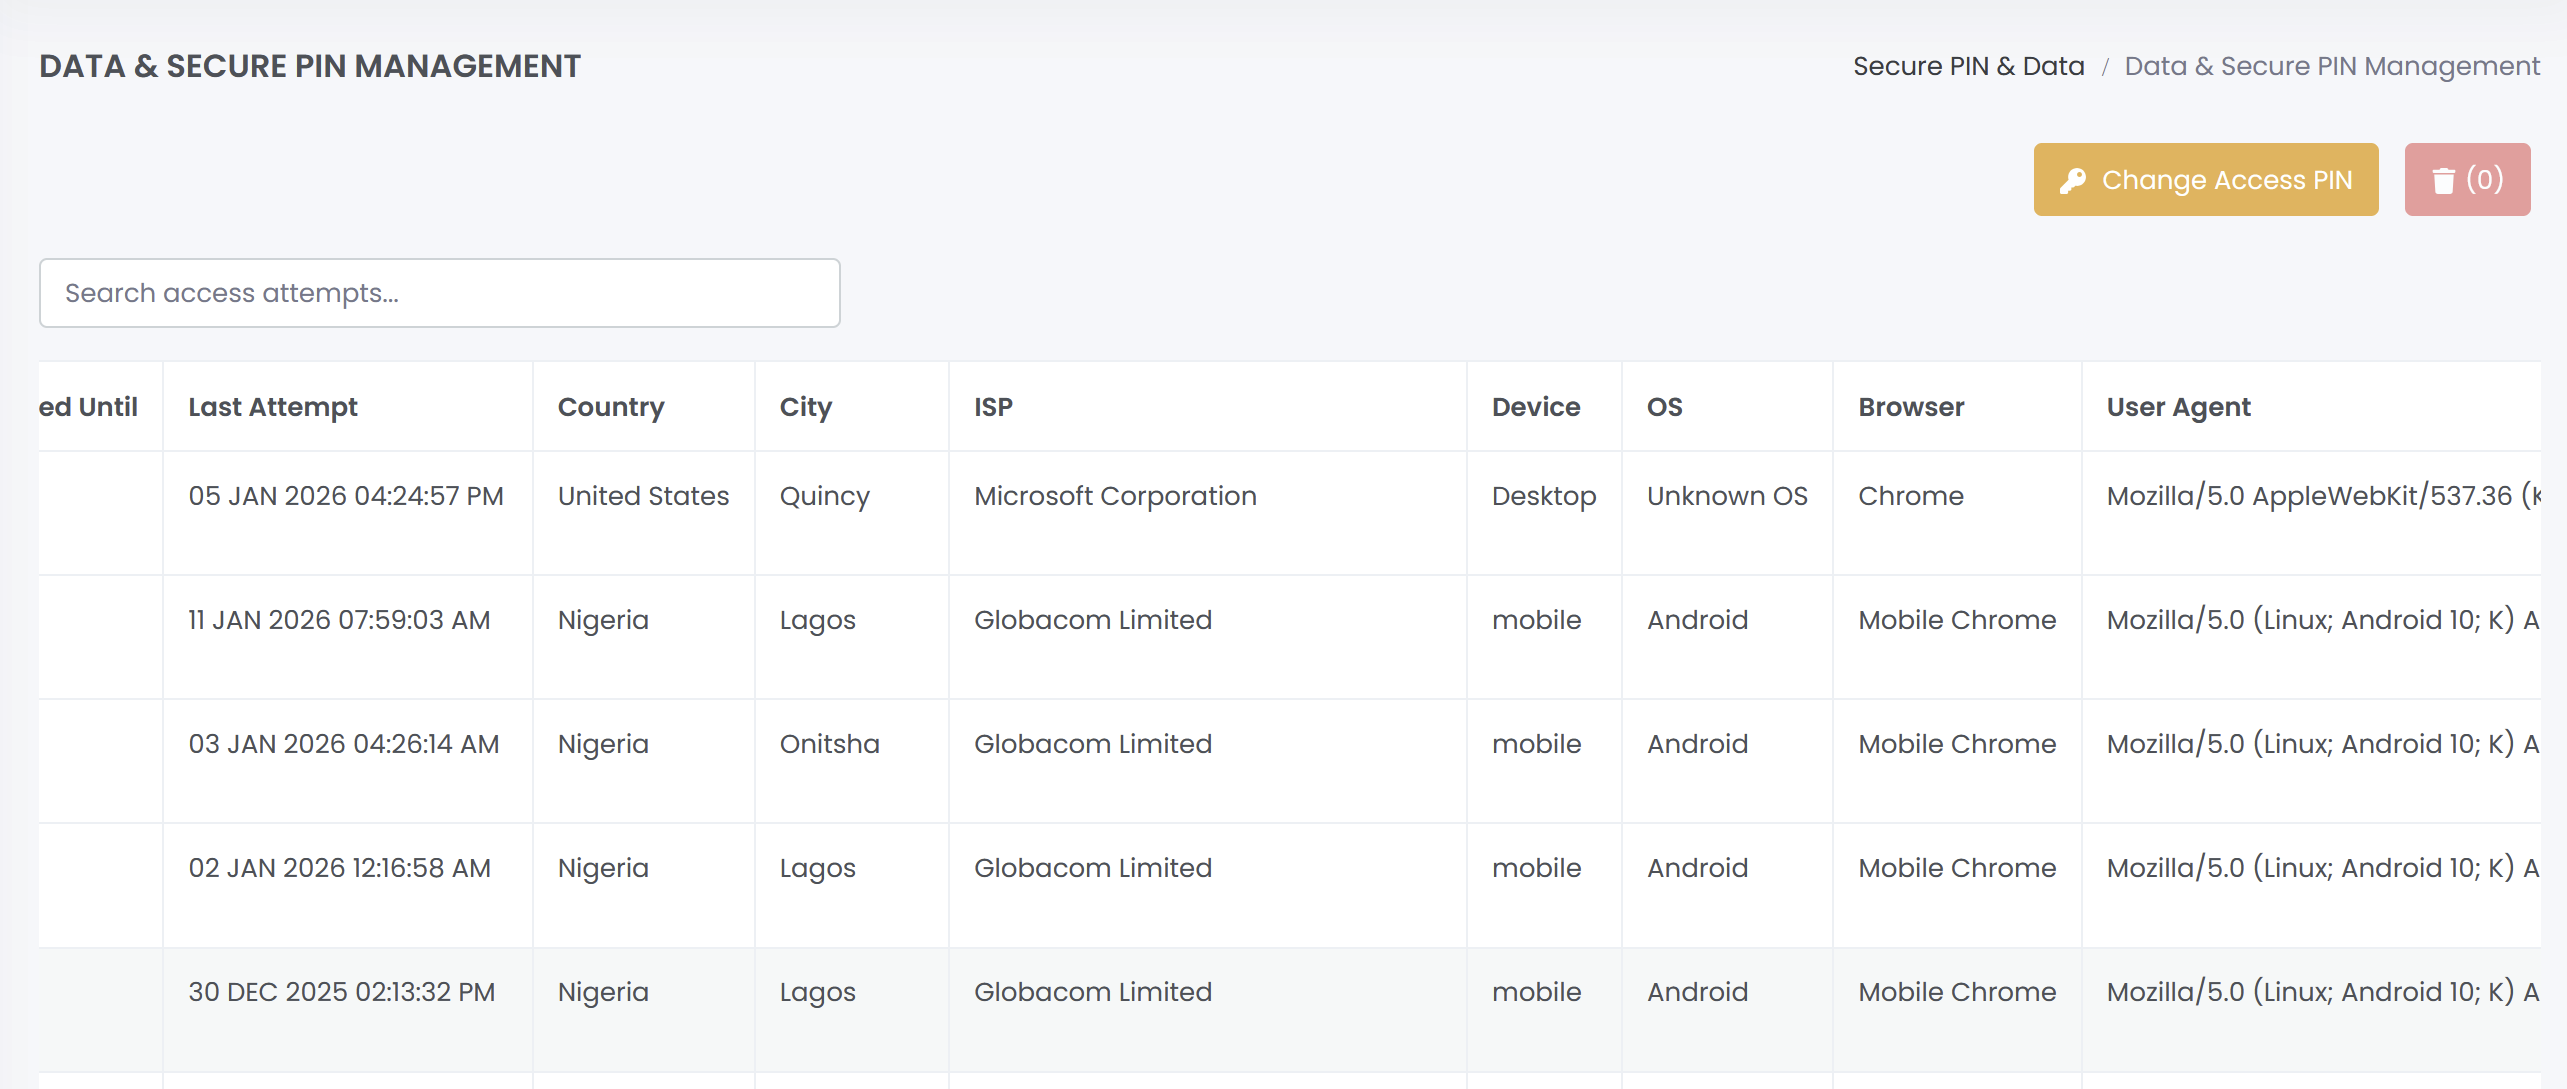
ZUSMPP Manual – Secure Pin & Data
Location: Sidebar → General Settings → Secure Pin & Data
Monitors all attempts to access PIN-protected sections of the platform. The system logs three types of access events:
Page Hit – A user visited a protected page but did not submit a PIN.
Pin Success – A user entered the correct PIN and gained access.
Pin Failed – A user entered an incorrect PIN.
The log table records details such as IP address, location, device, and time for each attempt. This helps track security and identify unauthorized access.
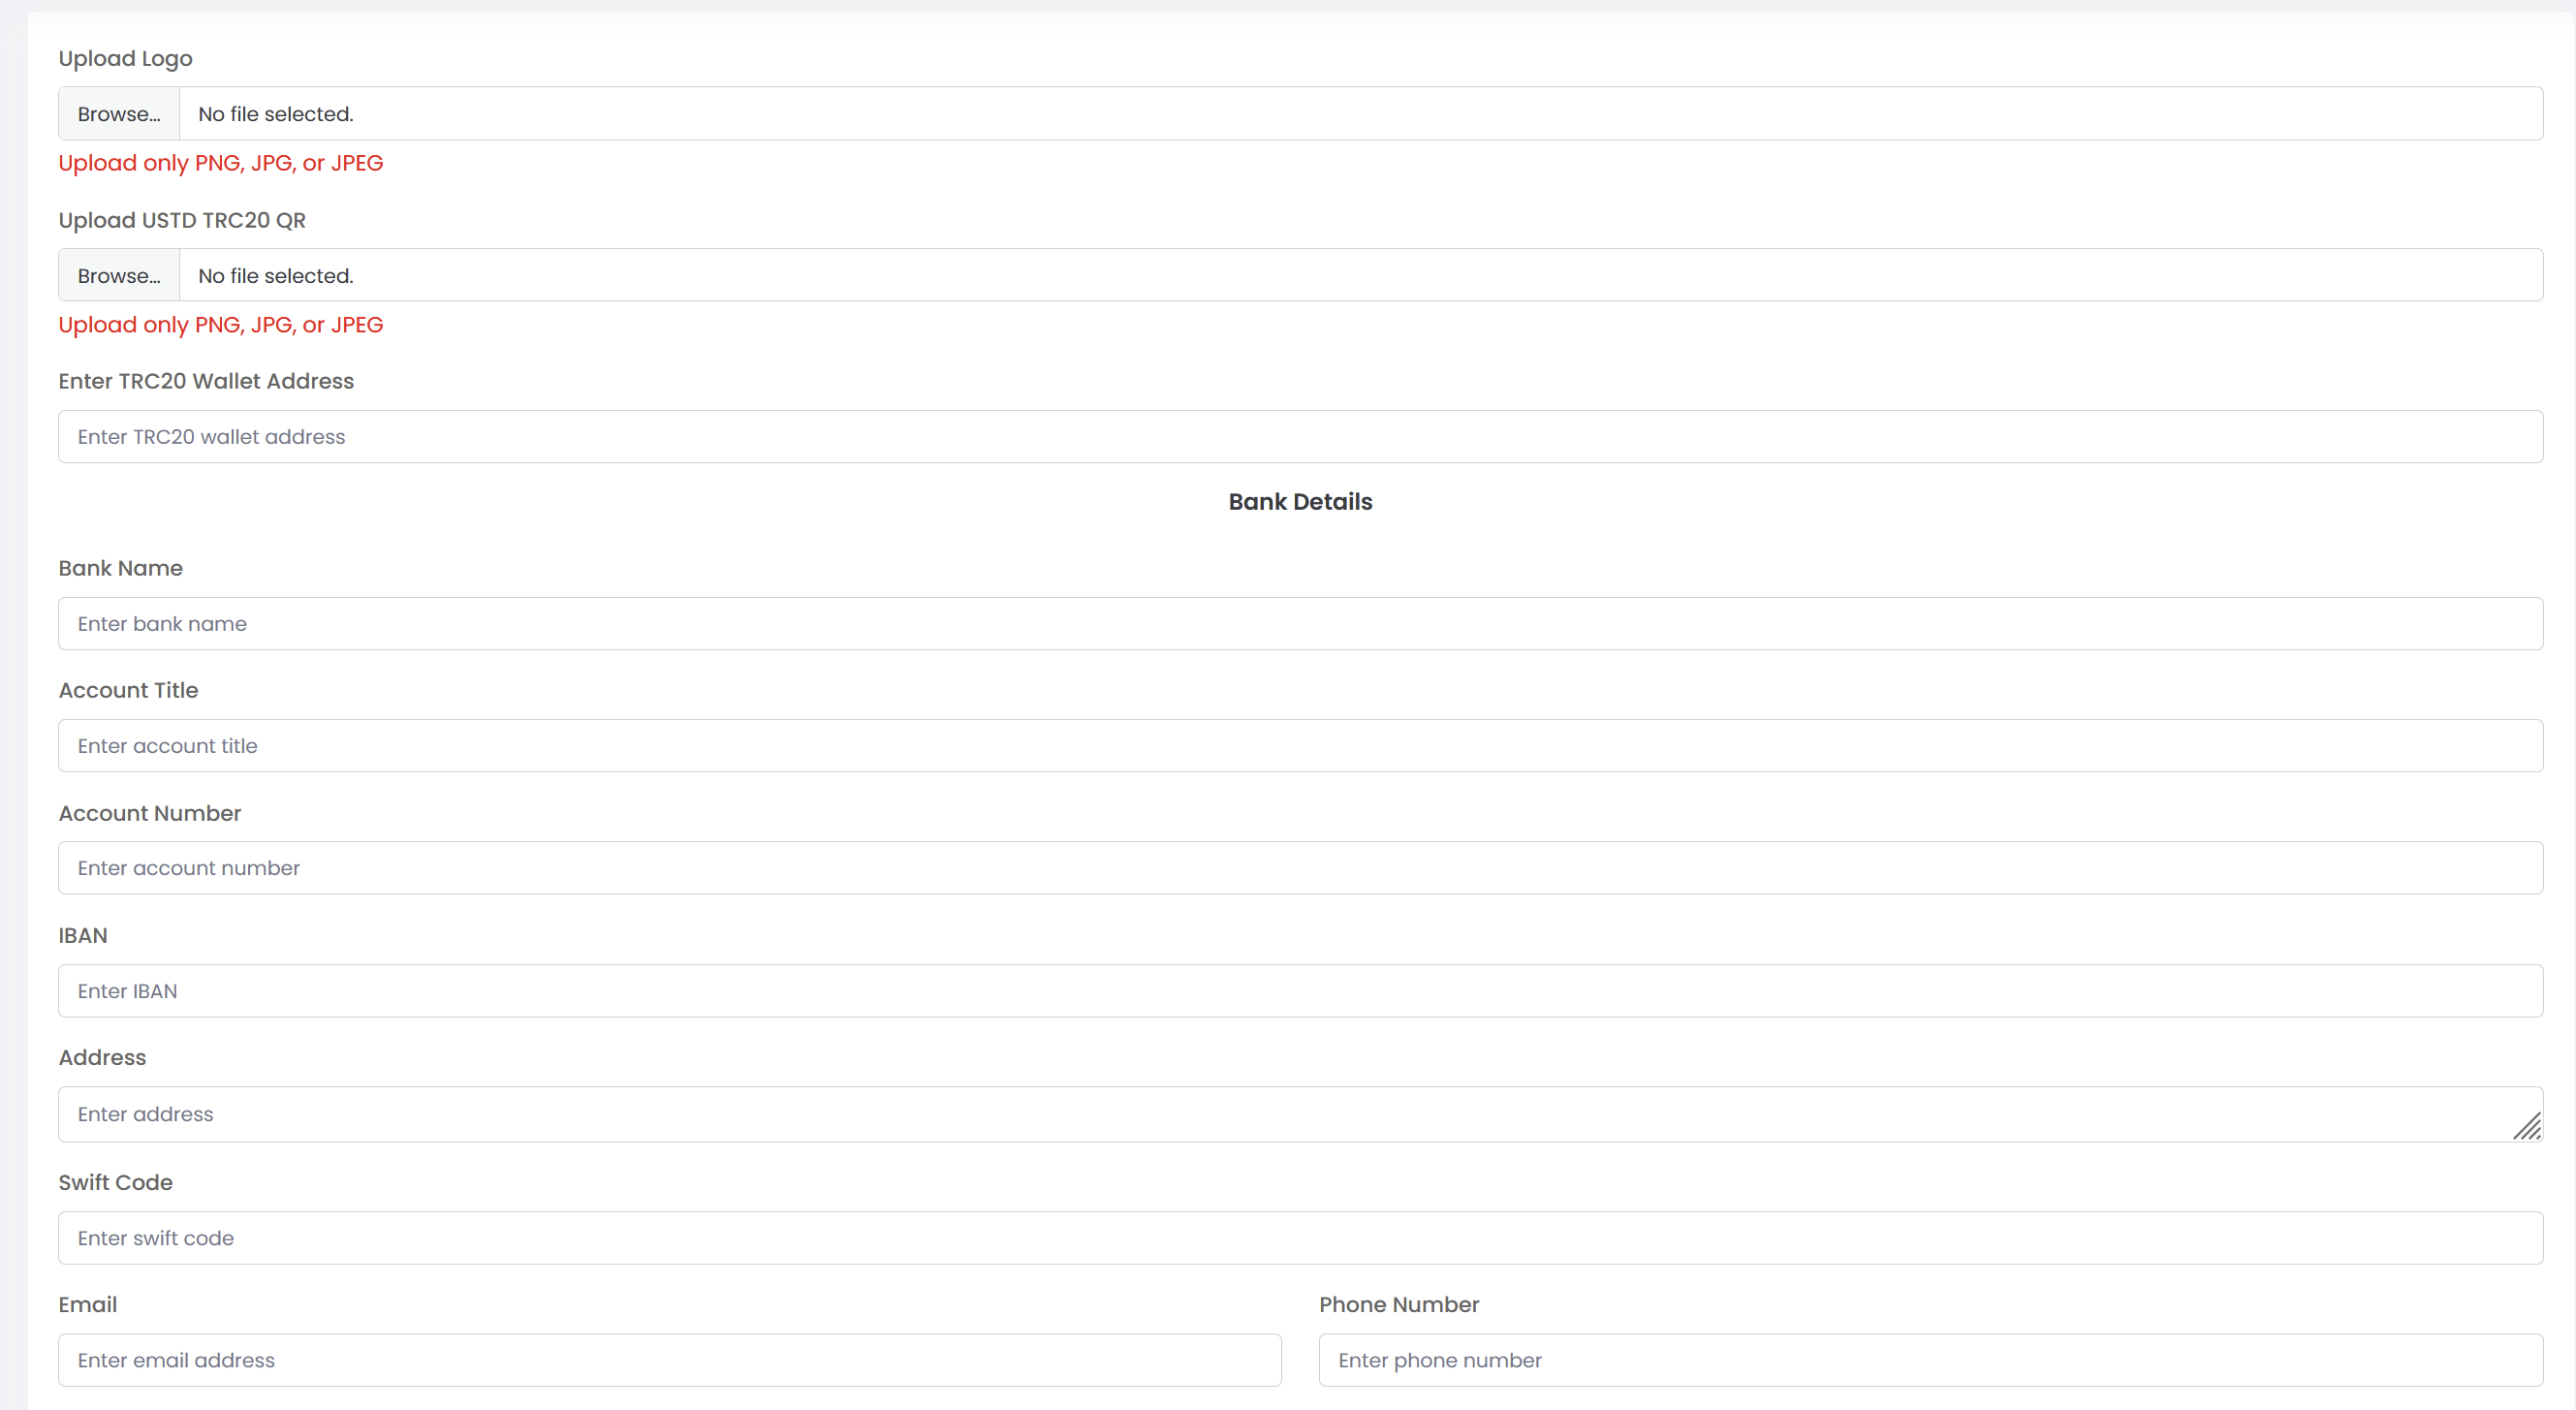
ZUSMPP Manual – Invoice Settings
Location: Sidebar → General Settings → Invoice Settings
Configure the business logo, wallet details, and bank information that will appear on all generated invoices.
You can upload your company logo, set a TRC20 wallet address and QR code, and enter full bank details including Bank Name, Account Title, Account Number, IBAN, Address, Swift Code, Email, and Phone.
The saved settings are displayed in a table and will be used to populate invoice documents automatically during billing.
ZUSMPP Manual – Tax
Location: Sidebar → General Settings → Tax
Manages tax types and percentages applied across the platform. Taxes configured here are available for selection when adding or editing consumers in the Account section.
1. Tax List
A table listing all configured tax types. Columns include Tax Type and Value (%), with action buttons to Edit or Delete each entry.
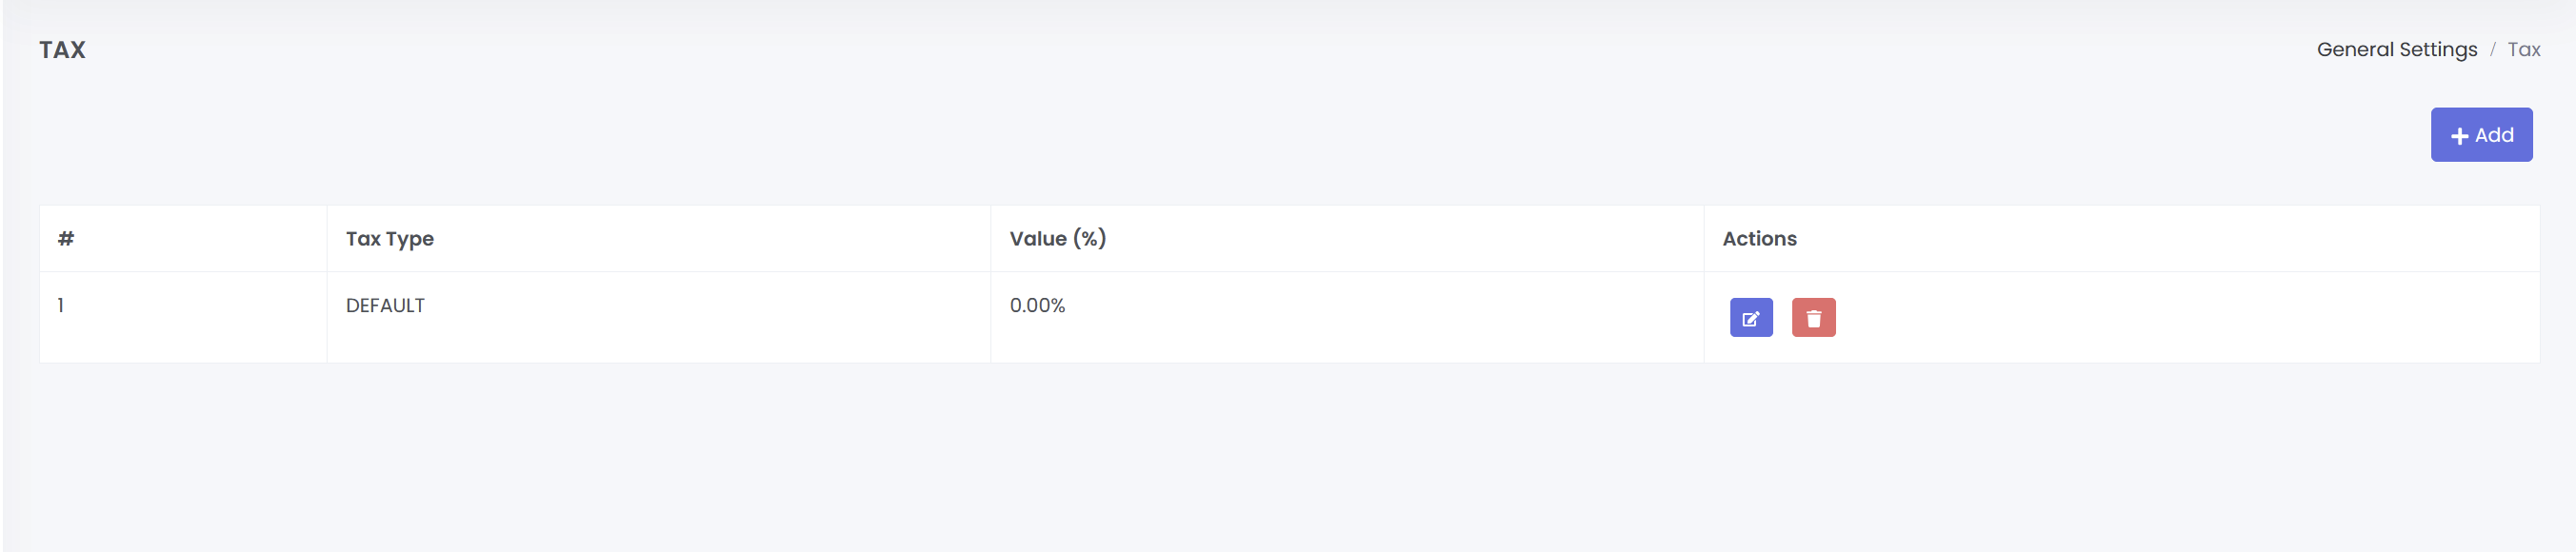
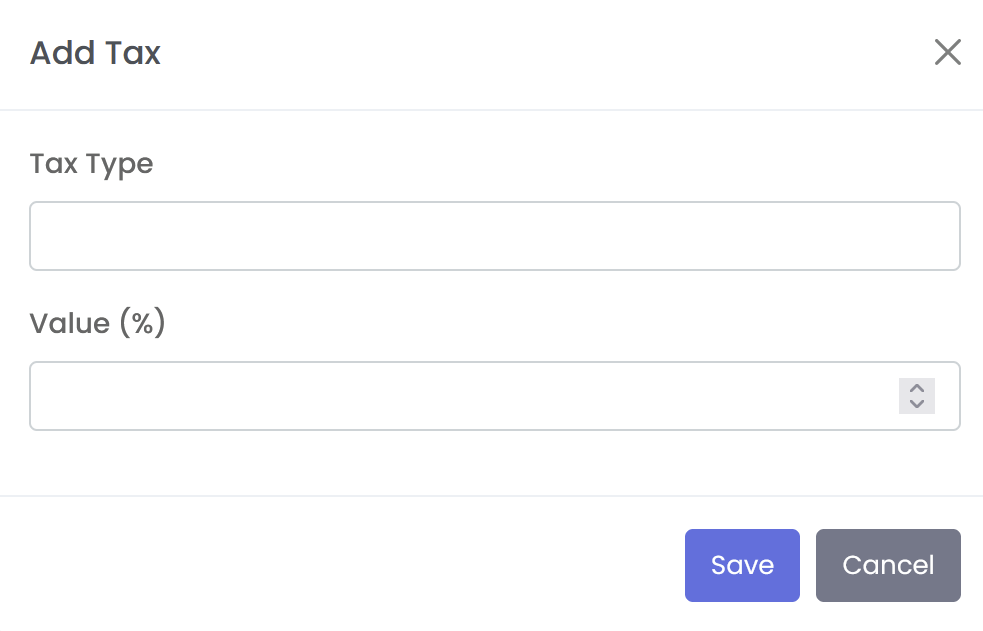
2. Add Tax
A form to create a new tax type. Fields are:
Tax Type – Name of the tax (e.g., FED, VAT)
Value (%) – The tax percentage
3. Actions
Edit – Modify an existing tax type or percentage.
Delete – Remove a tax entry from the system.
ZUSMPP Manual – Manage Logo
Location: Sidebar → General Settings → Manage Logo
Upload the main business logo to be displayed across the entire platform wherever a logo appears, including the dashboard, invoices, and reports.
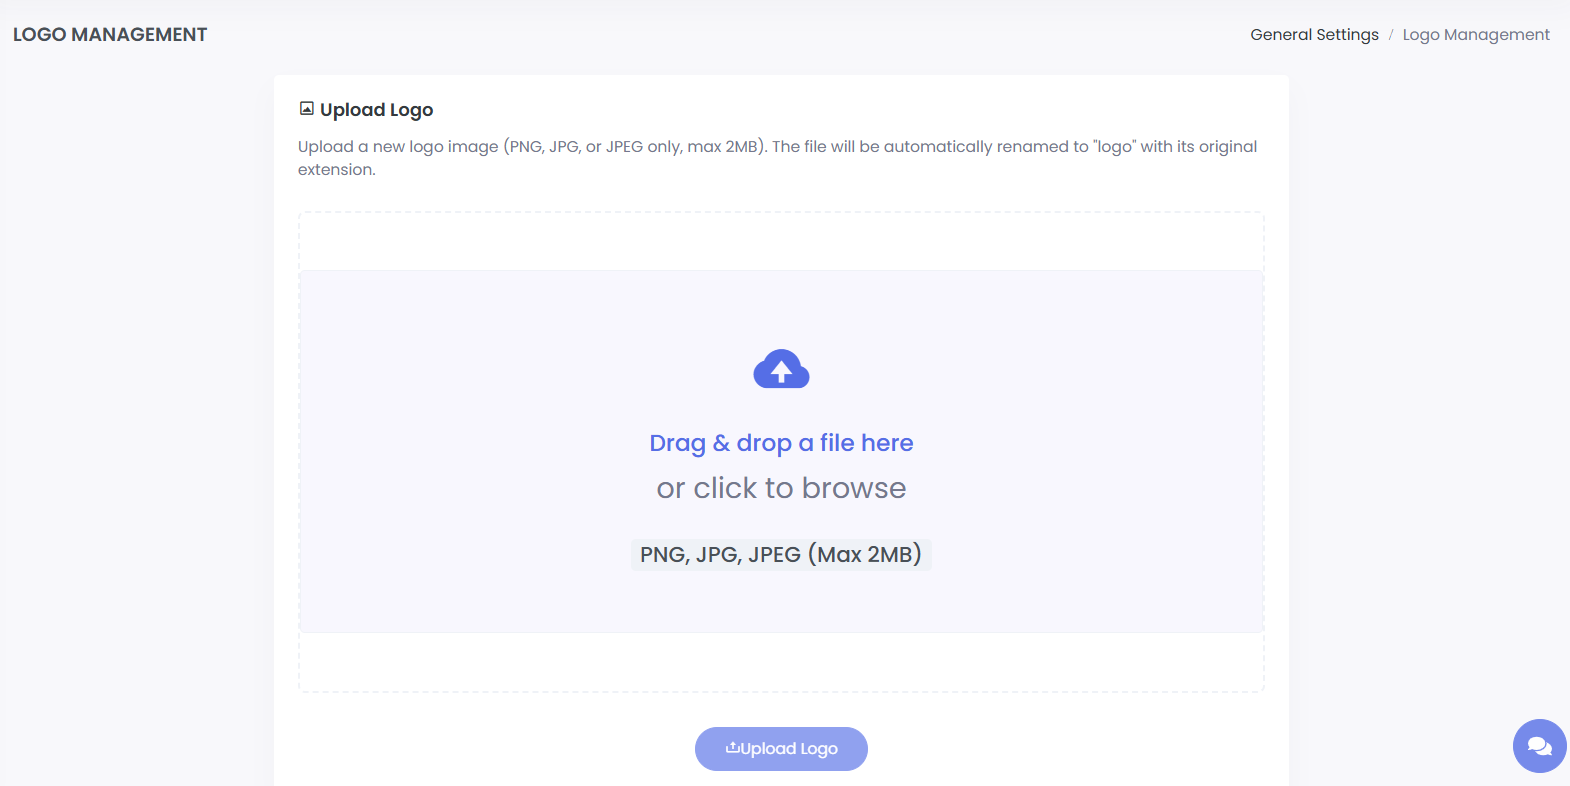
Upload Logo Interface
Use the drag-and-drop area or file browser to upload a logo file in PNG, JPG, or JPEG format (max 2MB). The file will be renamed to logo automatically.
Logo Application
Once uploaded, refresh the page to see the new logo applied system-wide to all pages and documents that feature the platform’s branding, ensuring a consistent appearance.